Denmark: Bikepacking North to West by Gustav Thuesen

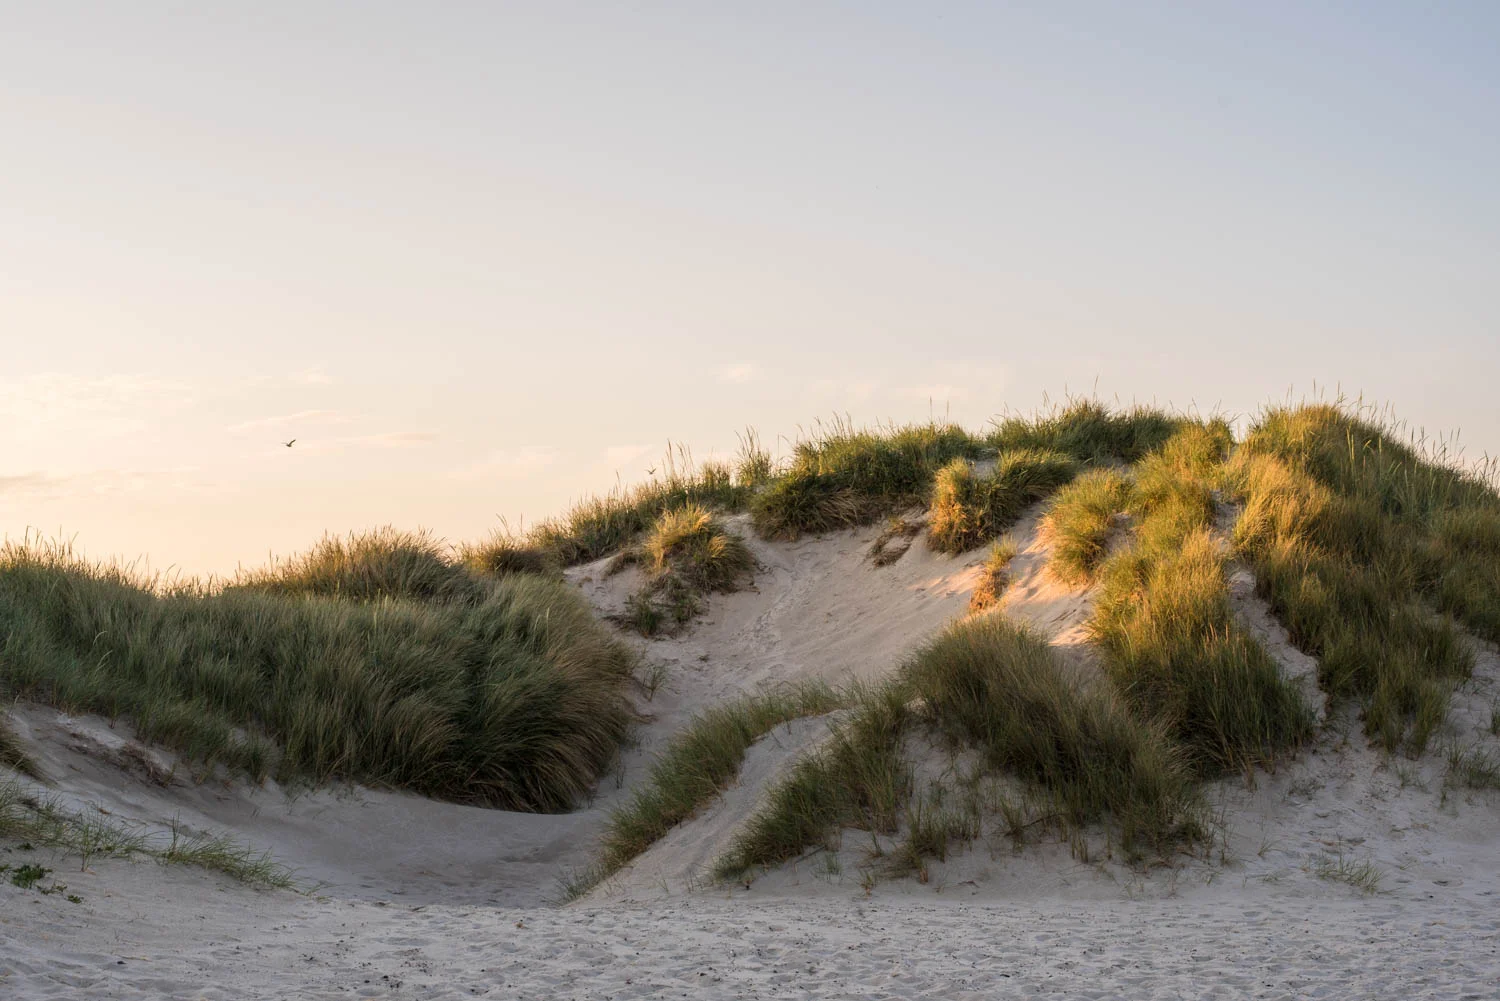
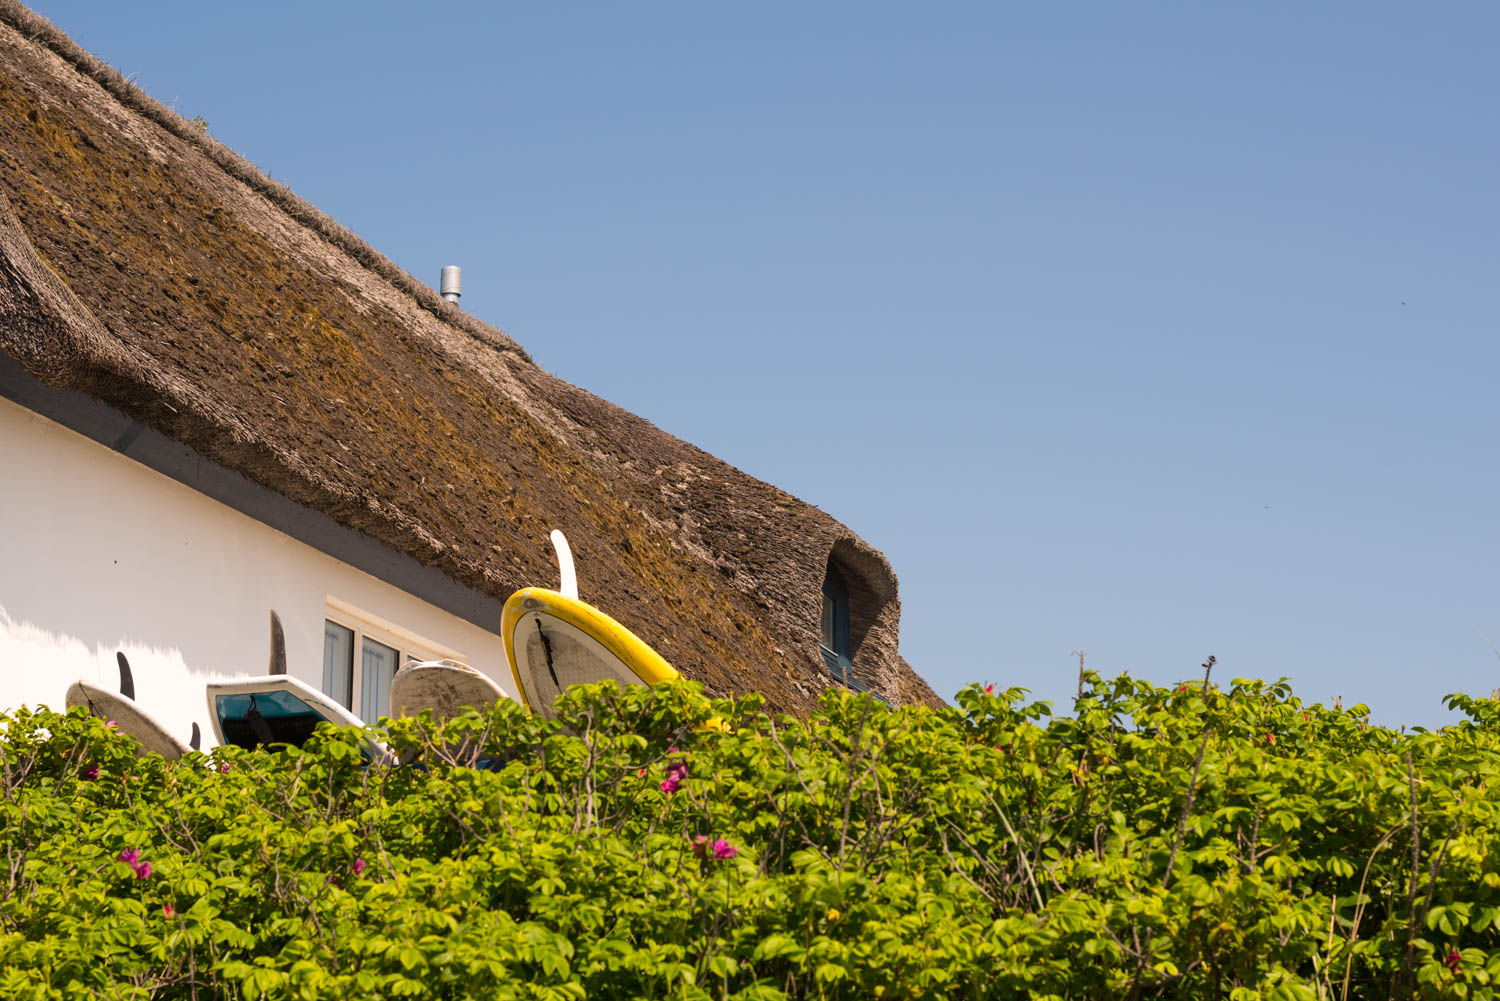
Two wheels, to legs was all that carried me on my photographic adventure from the most northernmost point in Denmark to the westernmost point in Denmark. 3 days, ~500 km, 2 bags of peanuts, a few bottles of Thy Champagne (beer) and some very sunburned arms (remember to use sunscreen, kids).

See you out there!

Iceland: Behind the Shot by Gustav Thuesen

“Is this right?” we asked each other again. We looked at each other as the road had gotten increasingly impassable the last hour. Our (too) small rental car was struggling to move forward on the loose dirt track which we had been driving on since we left the ring road. We had been driving through a flat desertlike landscape the last hour hoping to find a place to pitch our tent for the night. It was getting late, but the Arctic summer sun was still up. We didn't want to turn around to drive another hour the other way. We were in the middle of flat, stony, nowhere. We continued forward. But then we had to stop. “4x4 only” a dusty sign said. We had already bought our tiny car to its limit. We were forced to turn around. As we drove back we decided to stop to reevaluate the plan. So we turned onto a byway we had passed earlier. We got out of the car to stretch our sore legs. Rather hopeless we walked around in the dusty gravel.


But then as a fatamorgana in a bad cartoon a flowing waterfall covered in lush green vegetation appeared. We had actually been driving next to this river almost all the time but it was down in a creek so we couldn't see it.
A weird stick with a blue marking was next to the river. And another one further down. A trail! This was our best chance to find a spot for the night. We quickly got our packs on and got going.


As we came around a corner what seemed to be an old river bed appeared. Perfectly flat with a view to the volcano Hekla. It was obvious: This would be our place for the night.
We quickly pitched the tent and heated some water for the freeze dried meals. Dinner at the world’s best restaurant - ok, maybe not foodwise but the view was epic.      

After dinner we played a game of cards waiting for the sun to set - which was fairly late due to the arctic summer. As we got closer to sunset i pulled out my camera and began to shoot some photos just to check different angles and compositions. When the sun was gone I jumped back to the tent to catch a bit of shut eye. But just a bit.
I had set my alarm clock to 2 AM as I wanted to get some “night shots”.
After 2 hours of sleep my alarm woke me up. I really wanted to stay in my cozy sleeping bag but at the same time I knew I would be missing out if I didn’t got up. So I pulled myself up, tied my boots and did the ever so slightly awkward crawl out of the tent. I was surprised that it wasn’t any darker. I could quite easily walk around on the uneven grass without the aid of a headlamp. Which was nice because I had left the headlamp turned on in the tent to light it up (which my buddy wasn't too satisfied with…).

There was a quiet breeze as I walked around with the tripod resting on my shoulder. Earlier I had spotted a location from where I could get a nice composition with the landscape and the tent. So I went there and shot a few photos. It was really incredible to just sit there taking in the view, listening to the water trickling and capturing the magic. But I finished the photo shooting quickly as I wanted to catch the sunrise too which meant that I had to get up before 4 AM.


I enjoyed the comfort of my sleeping bag for 1,5 hours until I had to get up again. My buddy was now slightly more pissed. I took a quick glance out of the tent to check the weather: The Sky was almost clear. Perfect. I got back in my clothes and tied my boots. The initial tiredness was gone as I made my way to the different spots. There was a cold breeze and I kept the feet moving to keep warm. Not soon after the sun came up over the horizon. Everything was now bathed in beautiful golden rays and I could feel the slight heat of the sun on my exposed skin.

A great memory of just being out there!

Want to see more of my photos from Iceland? Check out my photo series from Iceland. 

Red Bull Illume Submissions by Gustav Thuesen

You have probably heard of RedBull Illume. If not, it is the biggest and most prestigious action sport photography contest in the world. After 3 years absence the Image Quest returned in 2016. There are 11 categories which all has a theme connected to action sports. I had photos for 7 of them. It took some time to go through all my action sport photos and it was hard to choose which action photos to submit and which to leave out. 
In the end I went with these photos:

CLOSE UP

ENERGY

LIFESTYLE

redbull-illume-submission-gustav-thuesen-photographer-fotograf-video-photo-foto-action-sports-adventure-travel-2.jpg

NEW CREATIVITY

PLAYGROUND

SPIRIT

WINGS

Fingers crossed. 
See you out there! 

Understanding Exposure: Get out of Auto by Gustav Thuesen

Many people look at the M on the mode dial with awe. Maybe they have tried it once and the photos ended up either underexposed (dark and blurry) or overexposed (too light). In this blog post I want to give a primer on how to take control in manual mode. I will not go too much in depth I just want to give you the basic tools to understand your camera and expand your creativity. 

Cut to the bone a camera has three settings that matters:

ISO
_Light: Adjusts the light sensitivity of the sensor. The higher the number the more sensitive to light.
_Superpower: Can lighten up dark scenes at the cost of image noise.  

Aperture
_Light: Adjusts how “open” the lens is. Think of it as an eye. Large pupil takes in more light. The lower the number the larger the pupil - more light is let in. 
_Superpower: Can blur out the out of focus parts (low number) or make everything in focus (high number).

Shutterspeed
_Light: Adjusts for how long time the sensor will be exposed to light. Too slow shutter speed makes for blurry photos.  A general rule of thumb is: the shutter speed should be at least the same as the focal length i.e. 50 mm focal length = 1/50th, 200 mm = 1/200th and so on. 
_Superpower: can freeze high speed action or make some artistic slow shutter speed photos with e.g. light trails. 

This holy trinity all affect the final exposure.  Adjust one and it is necessary to adjust at least one more to get a correct exposure. 

These three settings are often referred to as the exposure triangle. Let’s say to have a perfect exposure this triangle has to be perfectly equilateral (all sides are equally long).  

I’ll make an example:

First I have perfect exposure.

But there is too much noise in the image. So, I lower the ISO. 

Now the photo is underexposed. So I have to adjust at least one setting to get the correct exposure again (equilateral triangle). I need to freeze the action, so I want to maintain the shutter speed. 

So I adjust the aperture to get more light through the lens (open the pupil - lower f number). And now we have a equilateral triangle again - a perfect exposure.  

Hope this gives an insight on how your camera works and gives you the tools and confidence to start expanding your photographic knowledge. When you master these settings a world of photographic opportunities will wait for you. So get out and experiment. 
See you out there!  

How photography can grow your business by Gustav Thuesen

There has generally been consensus that photography is just something that businesses will do themselves with a point and shoot camera or is bought off of some online photo licensing service cheaply. This will ultimately not help the business but rather damage the business. Customers will think it looks unprofessional and cheap. It will deplete the brand. Here are three reasons why photography is important for businesses: 

Professionalism. Want to look professional? You better get a professional to shoot your photos. Most people will notice if the photos are shot by a professional photographer. I’ve seen a ton of businesses which have bought a DSLR to shoot photos for the business. What they forget is that just because you have a DSLR camera you don’t shoot good photos. Pop-up flash, mixed color temperatures, bad lighting and no thought what so ever to composition is common.
Another thing is the amount of time (and money) that is used only to get sub par results. It would most likely take a good chunk of time (and money) to achieve results that are somewhat close to be on par with a professional photographer.  
 

Stand-out. Many businesses struggle to stand out from the competition. The most important impression is the first impression. Today the first impression is often online. A wall of text doesn’t make a business website stand out - it makes people leave. Compelling photographs will make the site stand out and the visitor will remember it as the-page-with-the-nice-images. Furthermore photography is a point many businesses skimp on so it is an easy area to stand out from the competition. 
 

Branding. Want a strong brand? Use strong photography. The biggest businesses in the world has a very clear brand. Their visual profile is clear. Do you know it is an Apple commercial before you see the logo? Probably. Their visual profile is consistent. This consistency can be hard to achieve. A professional photographer will know how to create this consistency. 

To look professional you got to have photographs that look professional as well. You can do this yourself but often it will be faster and cheaper to get a professional photographer to do this. This will help the business to stand out from the competition. In the end strong photography will help build a strong and easily recognizable brand. 

How to: Star photography by Gustav Thuesen

Stars are amazing. Beautiful light sparkles across the dark sky. Chances are that you have seen some stunning star photos. Camera sensors can pick up a lot of light when set to shoot a long exposure. This means more stars. It is one of the few things where the camera is superior to the human eye. But how do you capture the magnificent night sky? Here is my process. 

1. Preparation
Before heading out in the night it can be a good idea to prepare from home. I use a few apps and websites which helps me know where and when the stars are at their best.
First step is of course to check the weather. A little small clouds is fine - especially when just training.
Next step is to check the moon phase I use this website. No moon is preferable. The problem is that it only happens once a month and that should line up with the weather as well. So the chances are small. So check out when the moon rises and shoot before that. To check that I use this web app. Last thing to check before heading into the night is where the stars are. The most magnificent sight is definitely the milky way. A little light pollution can make it invisible to the naked eye. To find the less light polluted spots I use this site. To find out where the milky way will be the Stellarium app comes in handy. It is free and does the job nicely.
In the end you can also just go out and hope some magic will happen - you will never come home disappointed, I promise.   

2. Gear
To make a great star shot a little gear is necessary. You will need: 

  • A camera that you can set manually.

  • A tripod.

  • A headlamp (nice to have).

That is all. 

3. Shoot
Your camera settings are important. Different cameras and focal lengths will need different settings due to the rule of 500 (or or whatever number you stick to). Stars are a moving subject so if the shutter speed is too slow you will get light trails which will make the stars look blurry. PetaPixel wrote a good article covering this so I wont get too much into this. Generally rule the rule is: 500 / focal length = max shutter speed. It will usually end up around 15-25 seconds. Your ISO should be as high as possible before your photos turn into a grainy madness. Around 1600-3200 is pretty standard. Aperture should be wide open. When pressing the shutter the next 20 seconds will fell like an eternity. When it is done it is like opening a present. You will be starstruck (ok, that was cheesy).  

4. The creative side of things
Now you know the technical - but no one teaches the creative.
What I like to do is to shoot up a steep slope and silhouette whatever is on the “ridgeline”. This gives perspective. Furthermore a person can make the photo more relatable as the viewer can relate to how it must be to stand there watching the beautiful sky. This evokes a feeling rather than just a pretty photo to look at. If you add a real living person make sure they stand dead still or else they will just be a blurry mess due to the long exposure.  

Now get out and get creative. Good gear is cheap these days and you dont need a lot to get started. So pack your bag and head out in the night and get your stargazing on. I will do a separate post on how to edit star photos - so follow along.
​See you out there!